Ferrero Rocher Chocolate Cheesecake
November 25, 2015
 I love Ferrero Rocher (duh). And chocolate. And cheesecake. And cake. So why
not mix them all together into one giant ball of deliciousness. I still
had quite a few leftover Ferrero Rocher’s from my little Pastel Christmas Brunch,
so I decided to make the yummiest of desserts and incorporate them. I
really love hazelnut anything, and this cheesecake cake incorporates
Nutella to get that perfect flavour.
Of course I am not the first person to think of such a fabulous idea, I
found a few online that I liked and modified them. I actually used a
chocolate cake recipe that I have in one of my cookbooks, so you could
use your favourite recipe, or try the one here. For the Nutella cheesecake layer, I used this,
and halved it. I decided to go with a taller cake, so I used 2-6 inch
cake pans and 1-6 inch springform pan instead of 9 inch ones, but you
could do that one if you would like a much larger cake. For the icing I
used this recipe for Chocolate Nutella Cream Cheese Buttercream, and it is so yummy! I also added some crushed Ferrero Rocher Chocolates.
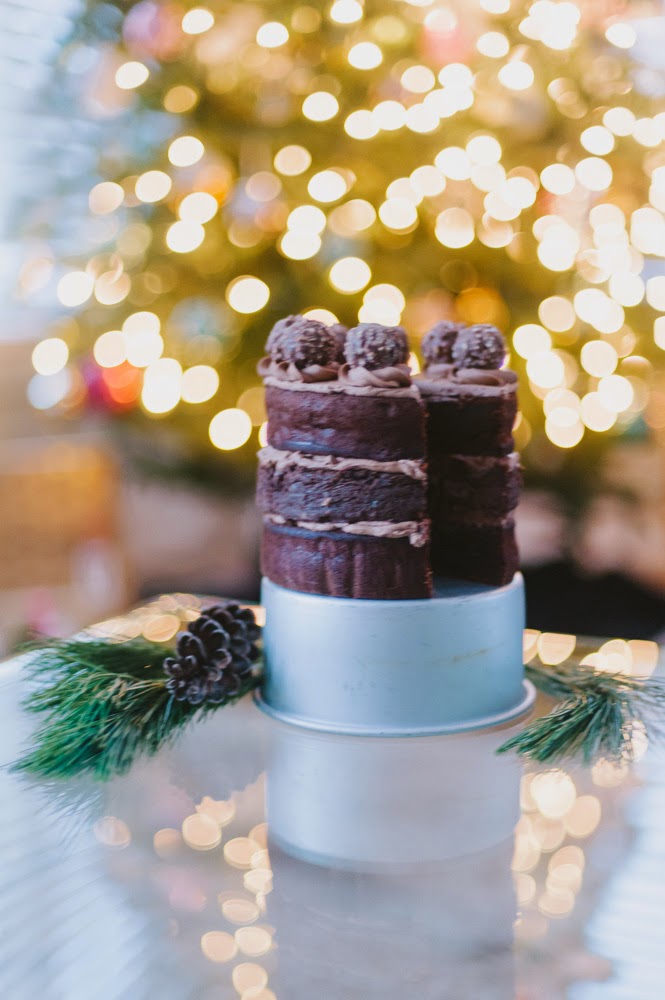
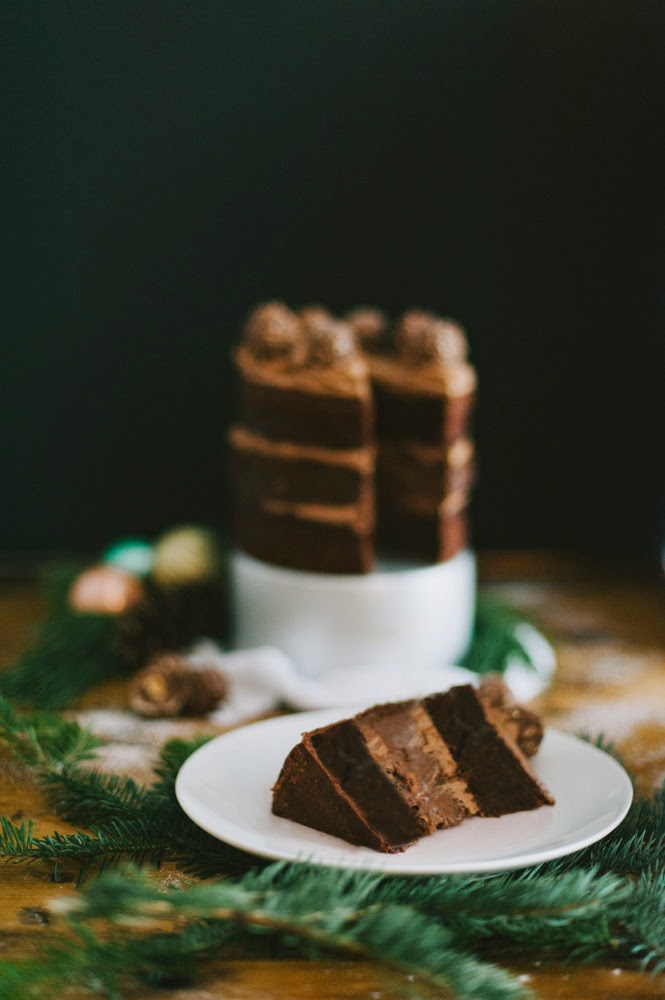
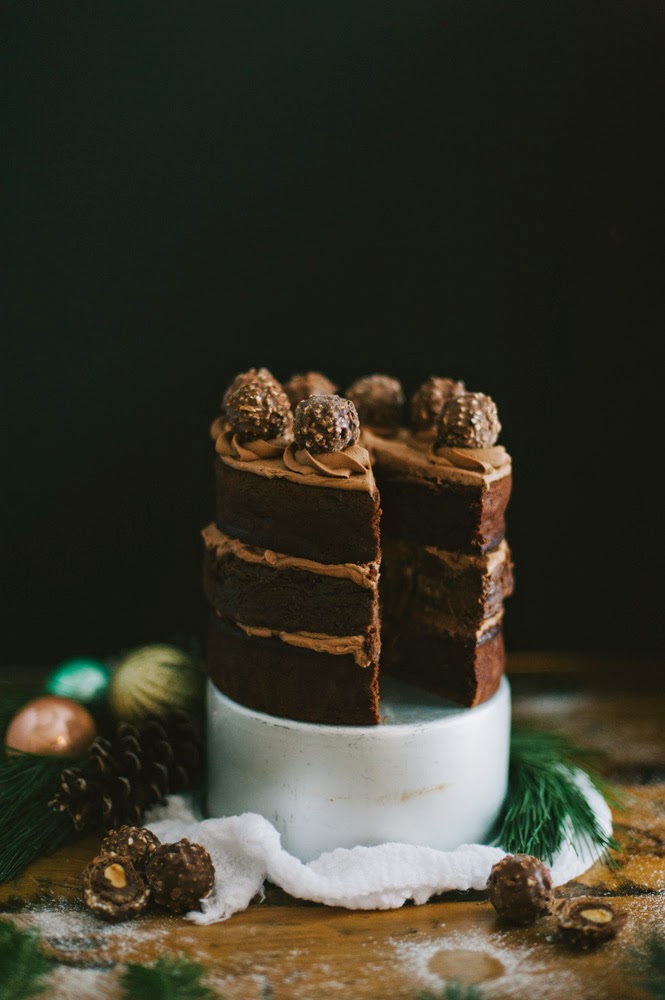
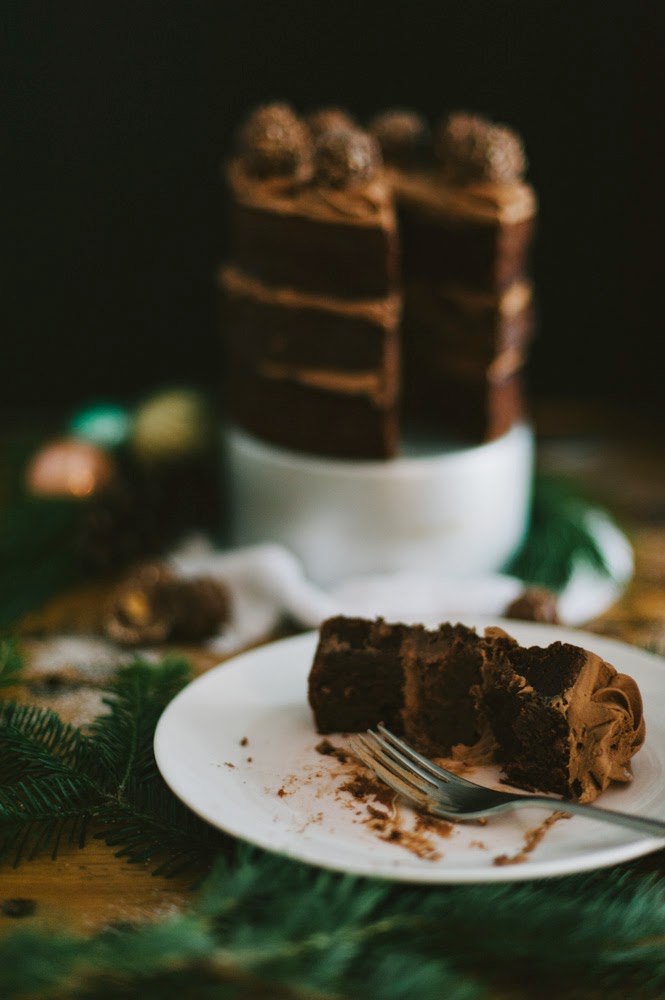
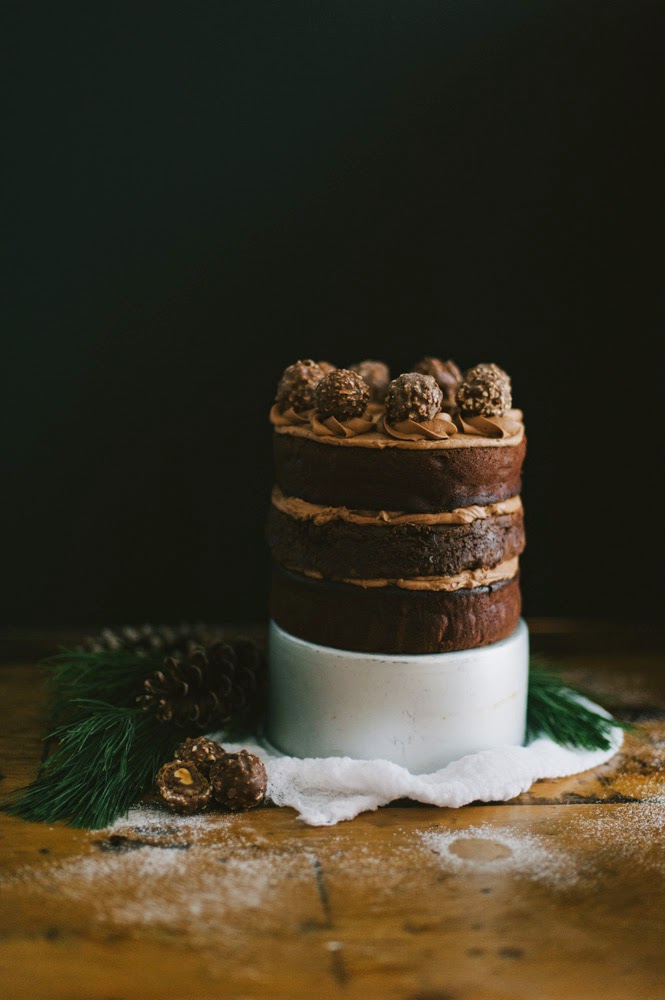
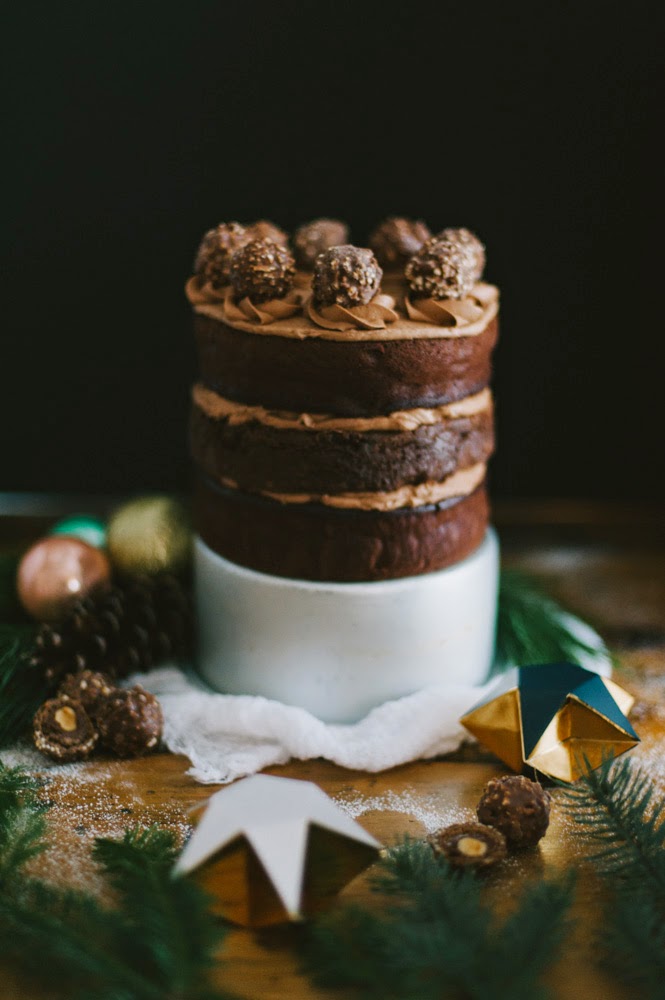
Bake and cool 2 cake layers, 1 layer of cheesecake, chilled, and
buttercream. To assemble Ferrero Rocher Chocolate Cheesecake Cake, place
first cake layer, (I level off with my cake cutter) on a cake stand or
plate. Place a layer of buttercream with Ferrero Rocher layer on top of
the cake and then add the cheesecake layer. Ice a layer of buttercream
on top of that. Then add the last chocolate cake layer. Ice the top of
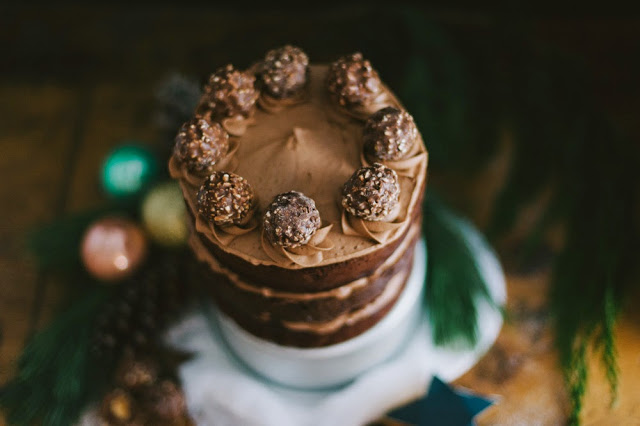
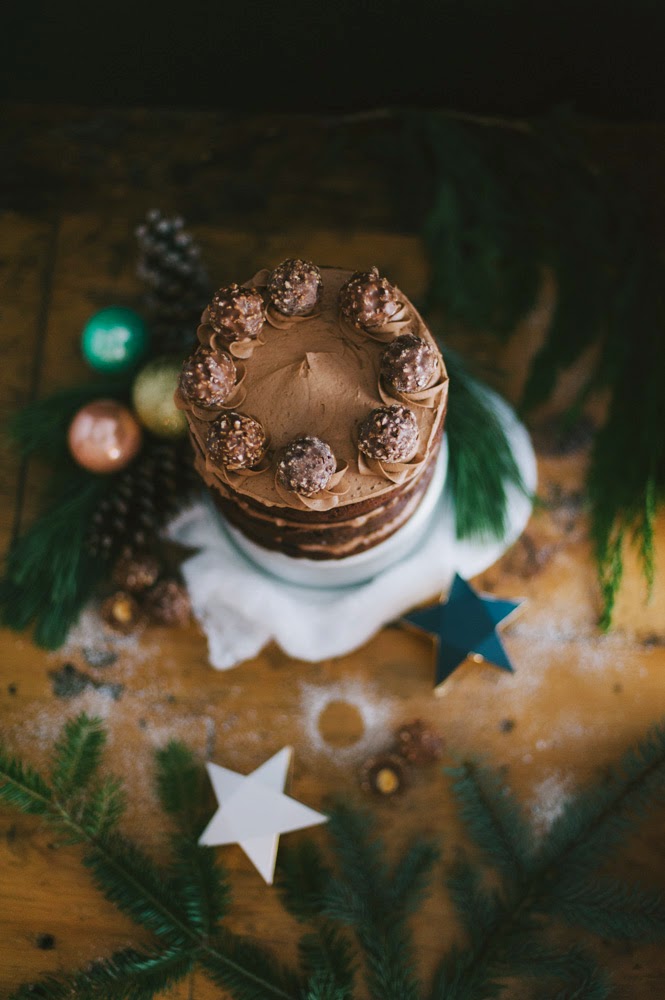
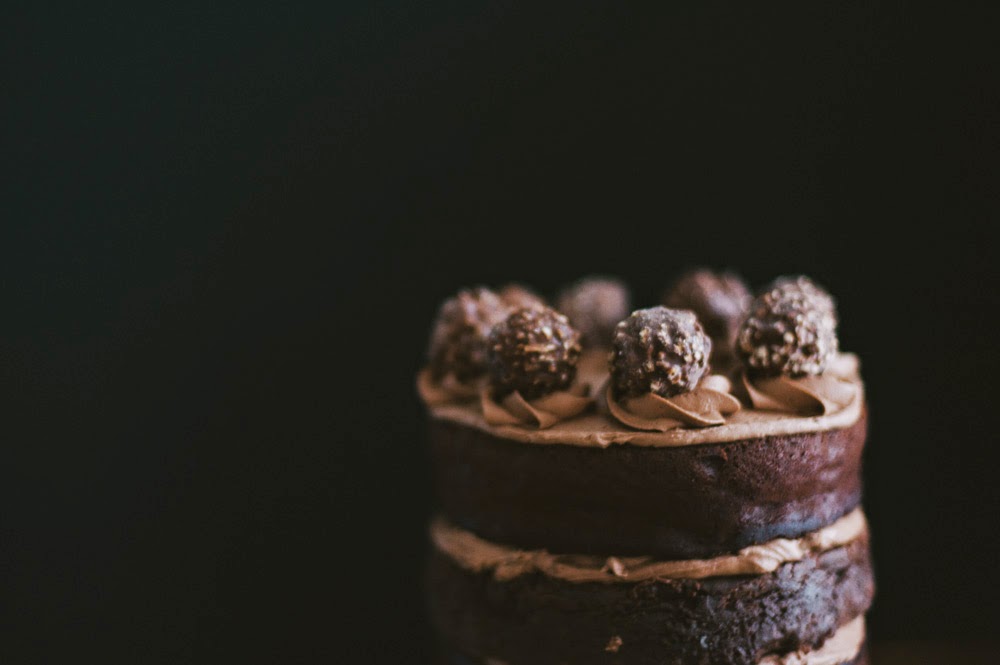
your 2 tier cake with some buttercream. I then used a decorators bag
fitted with a 1M tip and made little swirls evenly spaced along the edge
and topped each with a full Ferrero Rocher. Tadaa!
buttercream. To assemble Ferrero Rocher Chocolate Cheesecake Cake, place
first cake layer, (I level off with my cake cutter) on a cake stand or
plate. Place a layer of buttercream with Ferrero Rocher layer on top of
the cake and then add the cheesecake layer. Ice a layer of buttercream
on top of that. Then add the last chocolate cake layer. Ice the top of
your 2 tier cake with some buttercream. I then used a decorators bag
fitted with a 1M tip and made little swirls evenly spaced along the edge
and topped each with a full Ferrero Rocher. Tadaa!
TIPS:
-I always parchment paper my cake pans, it make for perfect sides when
you remove from pan. You can find a tutorial on how to do that here if you aren’t sure how.
you remove from pan. You can find a tutorial on how to do that here if you aren’t sure how.
-I put my cheesecake in the freezer in the pan after letting it cool so
that it got very stiff, as to not buckle under the top layer.
that it got very stiff, as to not buckle under the top layer.
-I put my buttercream in a decorator’s bag and make circles starting on
the outside, and then use an offset cake spatula to spread it out
evenly. This is not necessary but I find it makes it a bit more even and
prettier 😉
the outside, and then use an offset cake spatula to spread it out
evenly. This is not necessary but I find it makes it a bit more even and
prettier 😉


Here’s the photo setup for those who asked!
xoxo love,
Nat
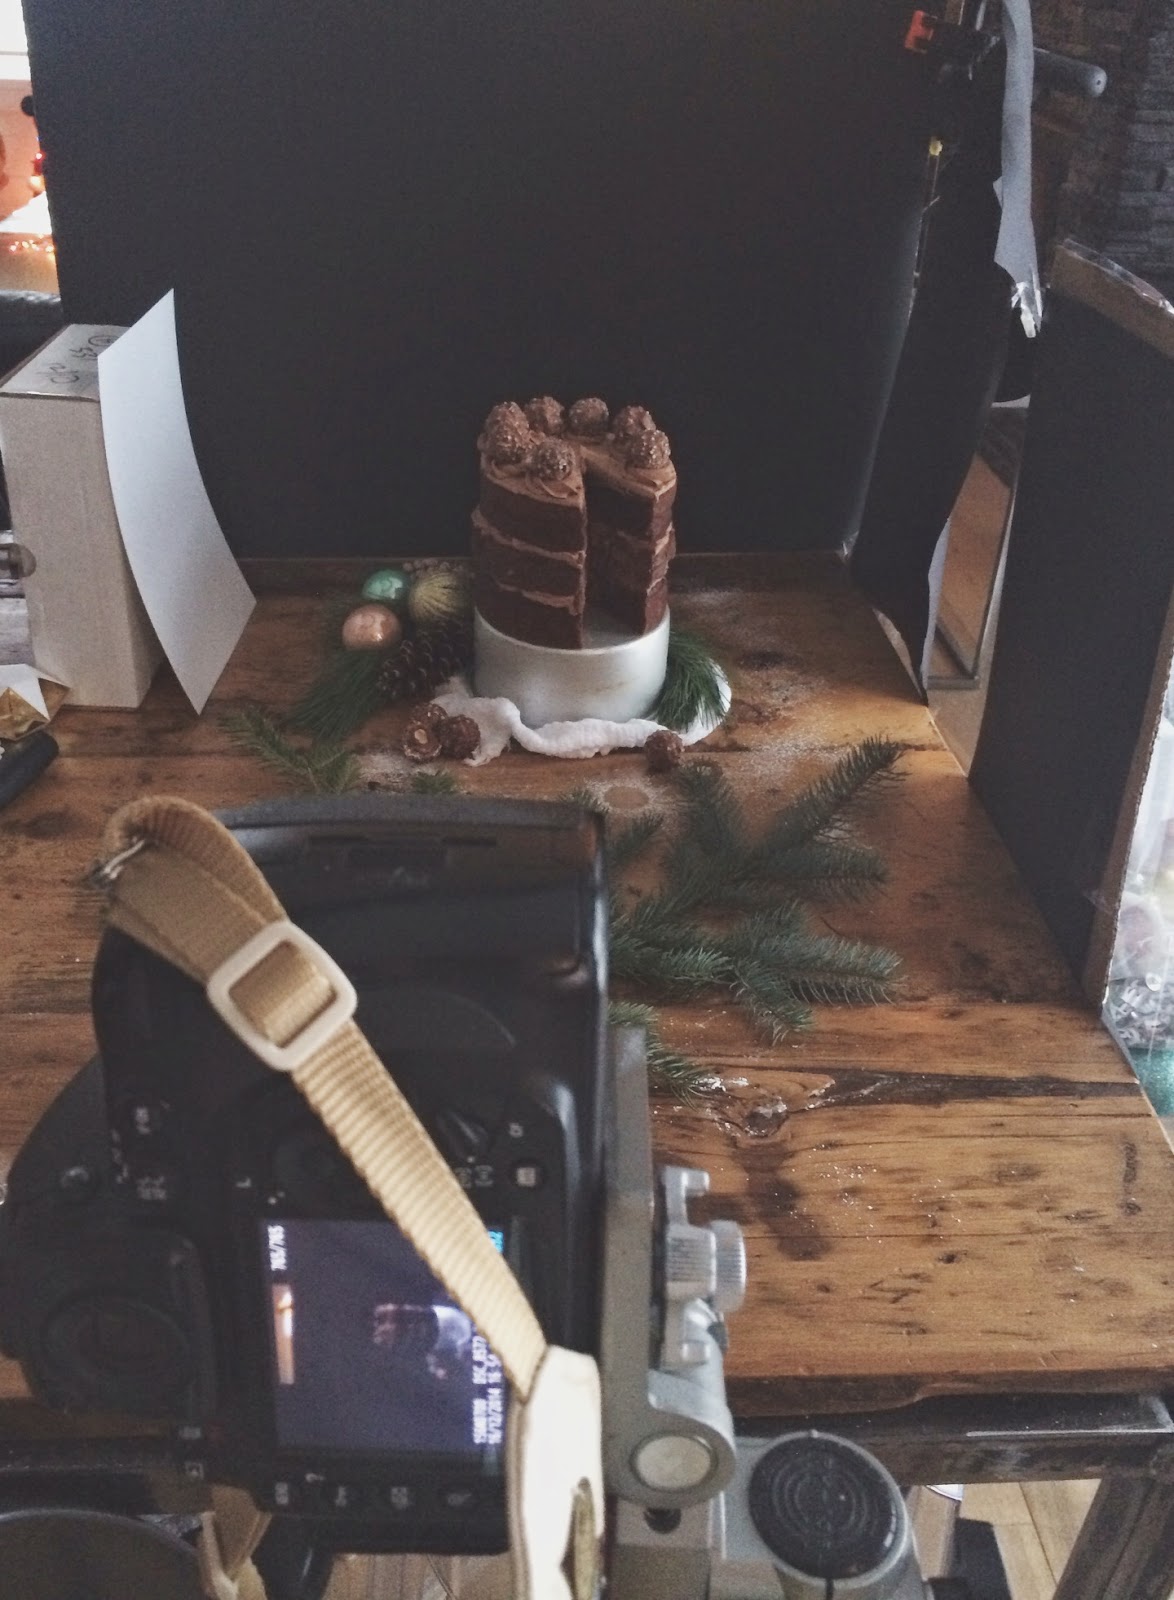
I used a black piece of foamcore as the backdrop and two smaller pieces
on the sides, with an opening to allow light to fall onto my objects. I
couldn’t find my reflector at that moment so I just used a piece of
white paper to bounce a little bit of light onto the left side. It was a
pretty gloomy day, so I decided to go for a bit of a darker look and am
very happy with how it turned out.