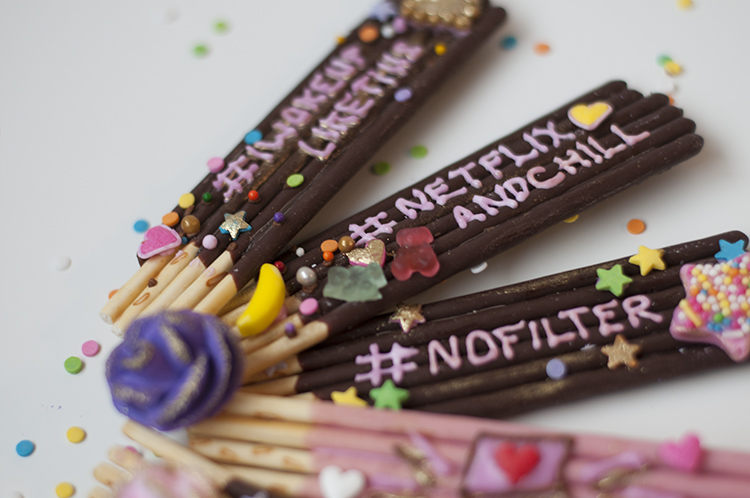
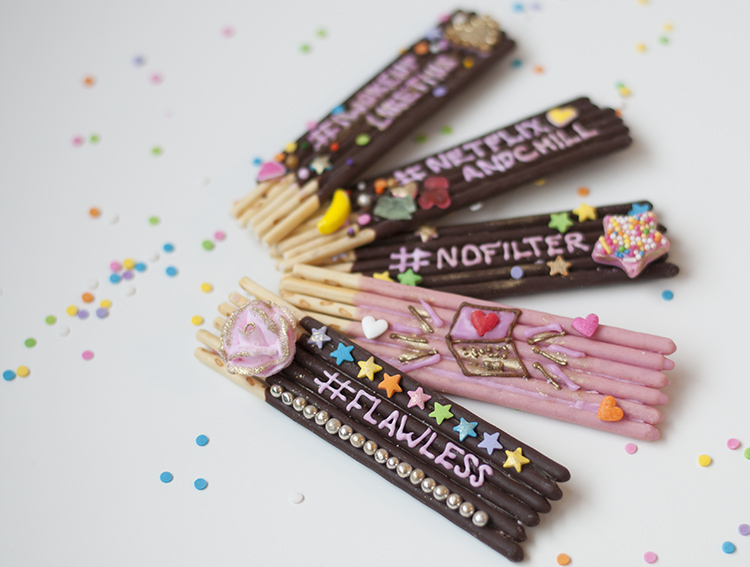
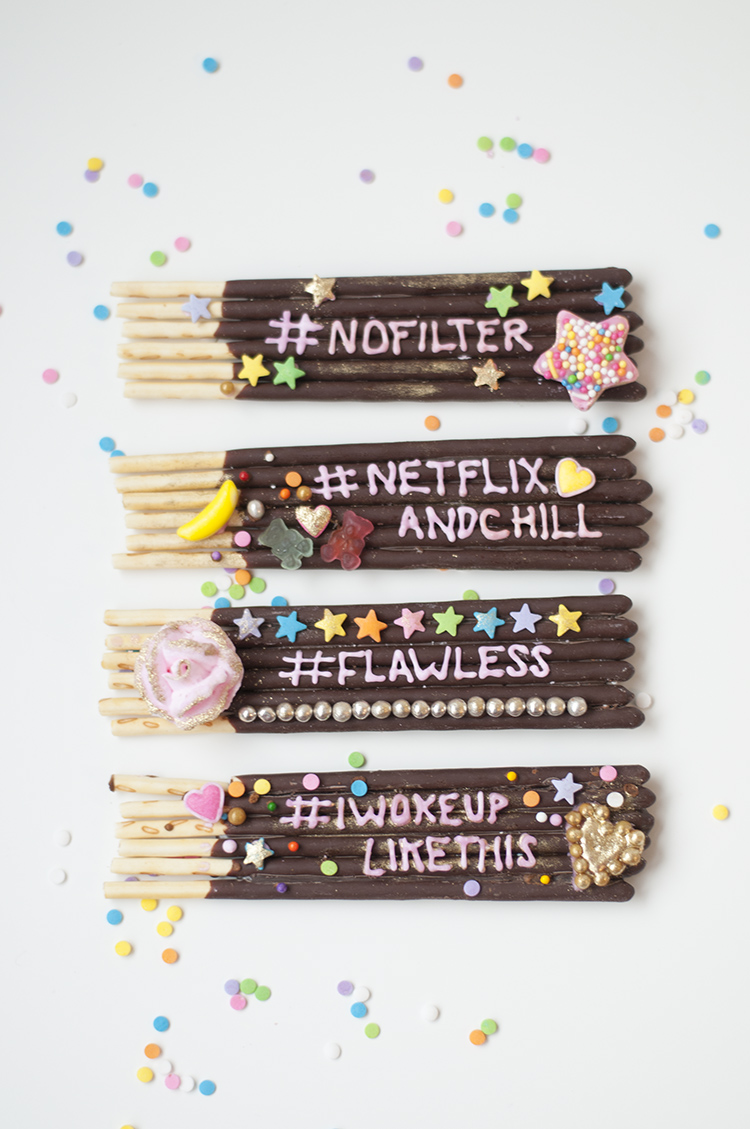
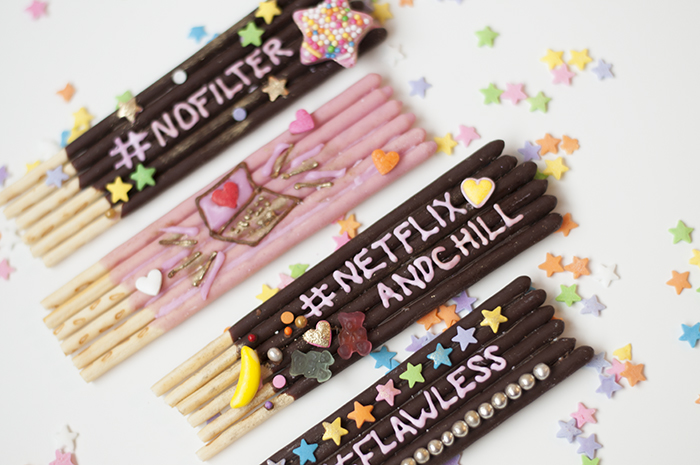
Day 3: Pocky Grams

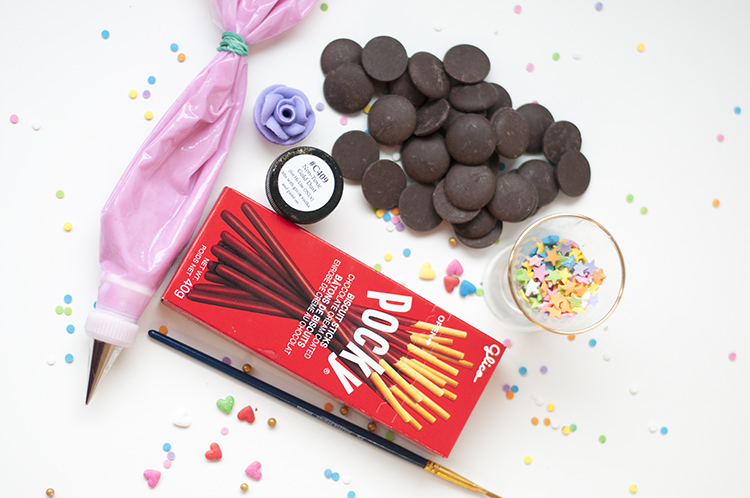
What you need:
Pocky (We used 6 for each)
Dark chocolate molding wafers (not chocolate chips)
Small cutting board
Paint brush
Parchment paper
Your favorite candies, sprinkles and nonpareils
Sugar roses (optional)
Gold luster dust (optional)
What to do:
1. Cover your small cutting board with parchment paper.
2. Melt molding wafers in the microwave, stopping to stir every 30 seconds. If you’re nervous about melting these babies read this. Keep melts in a microwave safe air tight container.
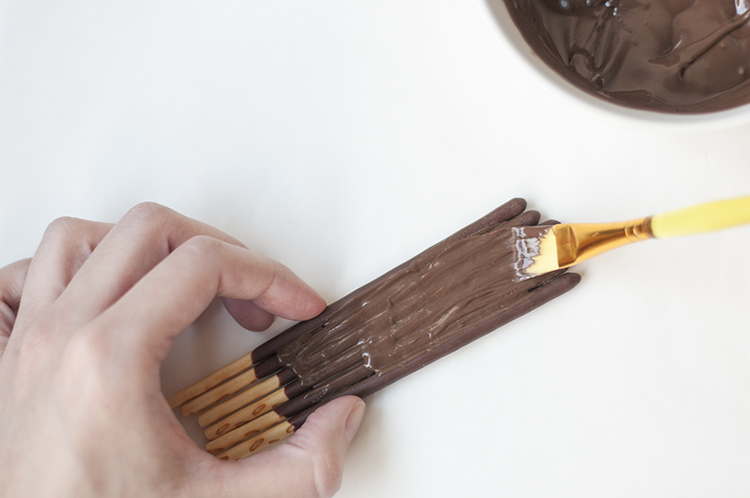
3. Hold 6 Pocky together on the wax paper.
4.
Dip paint brush into melted wafers and paint onto the Pocky sticks.
This is the glue that holds them together. Keep holding them for about a minute. Don’t move the Pocky until the melts are 100% solid to
the touch. Try not to let the chocolate drip through the cracks.
5. Once they’re dry put the whole cutting board in the fridge for 5 minutes, just to firm them up a bit more.
6. Flip the Pocky bar over.
6. To add your sprinkles and candies you can use a bit of the melted molding wafers and a paint brush as glue. If they get hard just put them back in the microwave and reheat 15 seconds at a time keeping a close eye on them. OR if you’re making royal icing, that makes a great adhesive as well.
To write you need:
-Royal icing
-Decorators bag
-Elastic
-#1 round tip (optional)
-Coupler (optional)
To write on your Pocky bars you need royal icing. You can use a decorators bag and simply snip the tiniest bit of the tip off OR if you want more control you can go pro and get yourself a coupler and a #1 round tip.
Royal Icing:
-Wooden spoon
-Large egg white, or equivalent amount of dried egg whites
-2 cups of icing sugar
-1/2 teaspoon of water
1. Combine the sugar, egg white, and water in a large bowl. Mix
ingredients together for about 2 minutes, until the icing is thickened
and smooth. It should form soft peaks as seen below.

Photo Source: Cake Journal
2. If it’s too thick, add drops of water. If it’s too thin, add sugar. Keep your royal icing in an airtight container in the fridge when not being used. It will last up to 2 days.
3. If you want to color your icing add small drops of food coloring and stir until you have the desired color.
4. If you’re using a tip, prep your bag with a coupler. I found this quick tutorial in case you’re not sure how to.
5. Put your decorators bag in a glass and fold the edges over the side.
6. Spoon your royal icing into the bag and tie with elastic. If you’re not using the #1 tip cut as little as possible off the tip of your bag.
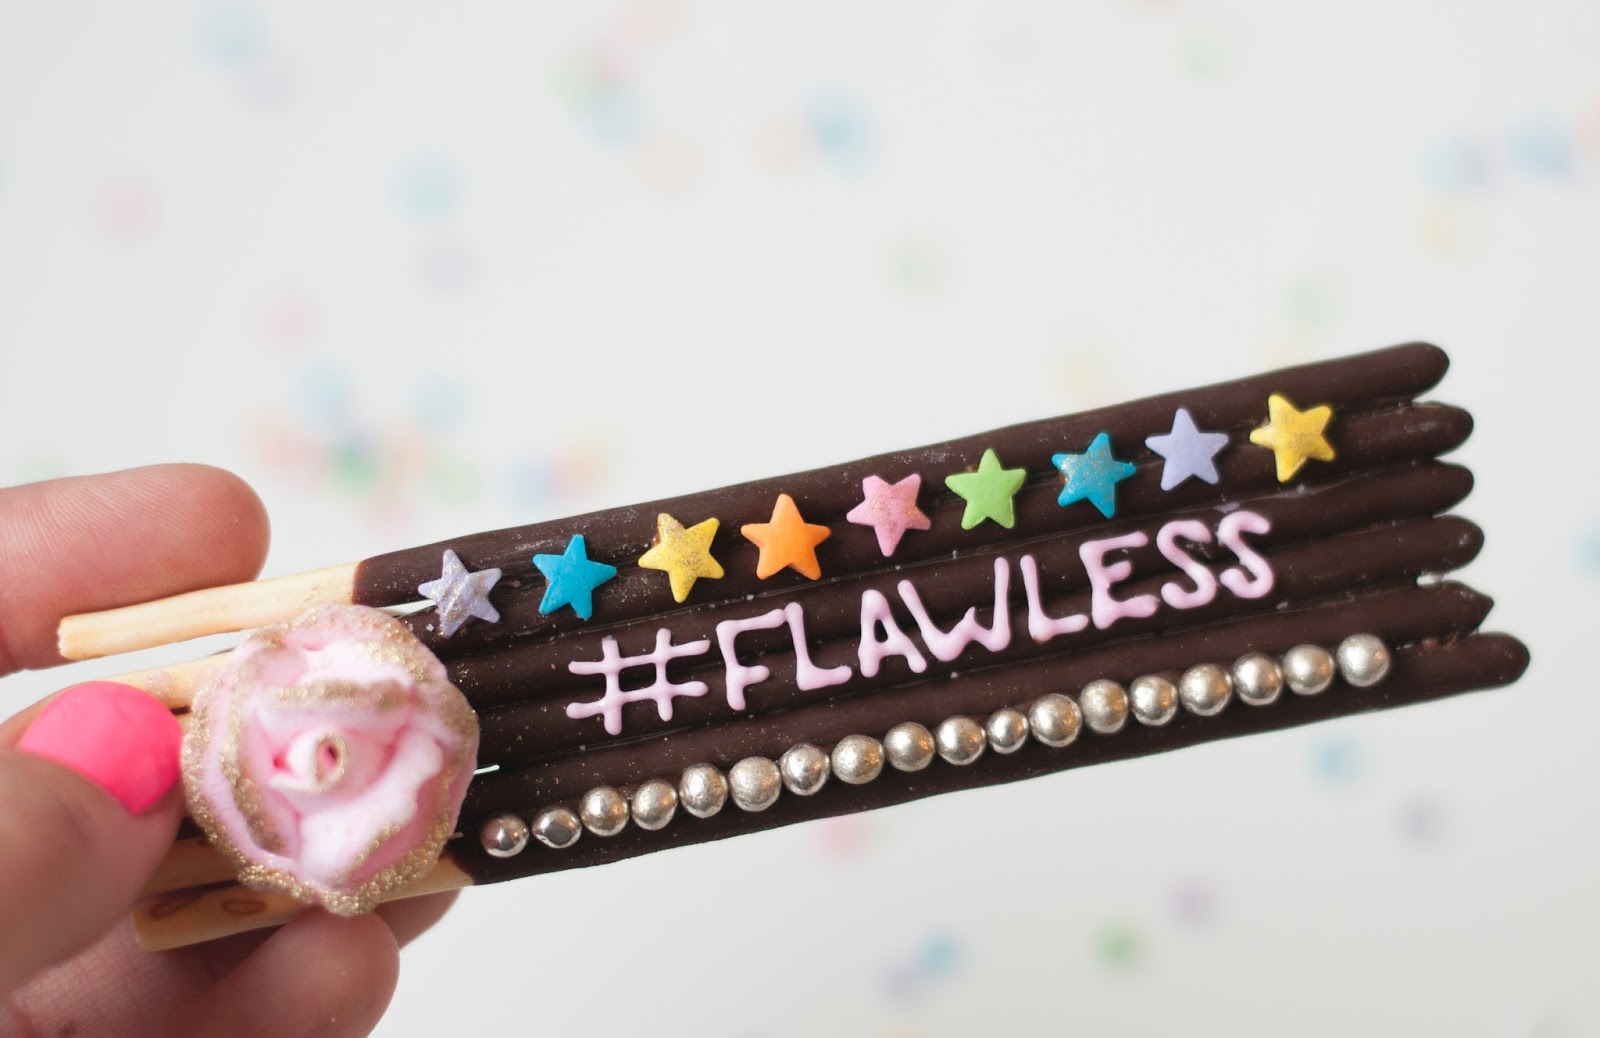
7. Write whatever you want on your grams. It’s good to practice first of a piece of parchment paper.
Note: I like to put a tiny bit in my decorators bag and test the consistency before filling it up. That way you can add more water or sugar before it’s all prepared in the bag.
Adding gold:
If you want to add gold to your Pocky bars mix a drop or vodka with
gold luster dust in a cup (I always use the lip to my luster dust) and
mix them with a paintbrush until you get a nice paint-like consistency.
This youtube video goes through the process in more depth if you’re interested.
Sugar roses:
I bought them at Bulk Barn and added the gold luster dust around the edges.
You can dip your bars in sprinkles, cover them in candy, or keep them simple with just a message. Get creative and have fun!
Sweetest Love,
Mercedes